
Create a Workflow Recipe
The Workflow Automation Projects and their Recipe Builder is a core component of Automation Studio that allows users to create automated workflows, referred to as "recipes." Every recipe has a trigger, which defines the event that starts the workflow. When triggered, the recipe performs one or more actions, such as creating a corresponding contact in Salesforce or sending a welcome email. Recipes use connectors to interact with different apps, ensuring seamless data flow across systems.
Recipes support both simple and complex workflows, with features like conditional logic for decision-making, loops to process datasets, and error handling to manage exceptions.
Key Components in Recipes
A recipe follows a structured flow that defines when it runs, what actions it takes, how data moves, and how errors are managed. Each component is interconnected, and understanding these relationships helps you design recipes that are efficient, reliable, and maintainable.
A recipe typically uses the following components:
- Trigger: Defines when the recipe starts running. Triggers can be based on time, data changes, or specific actions in connected systems.
- Action: Specifies what tasks the recipe performs once the trigger condition is met. Actions can include data transformations, API calls, or updates to connected systems.
- Data flow: Controls what data moves between apps.
- Logic and conditions: Determines how different scenarios, such as missing targeted data are handled or other optional logic that determines whether certain actions should be executed based on specific criteria.
- Error handling: Ensures the recipe can recover from failures.
Creating a new Recipe
Locate Recipe Builder
- Access the Recipe Builder by navigating to the Automation Studio interface in Trackunit Manager and select Projects > Recipes > Create Recipe
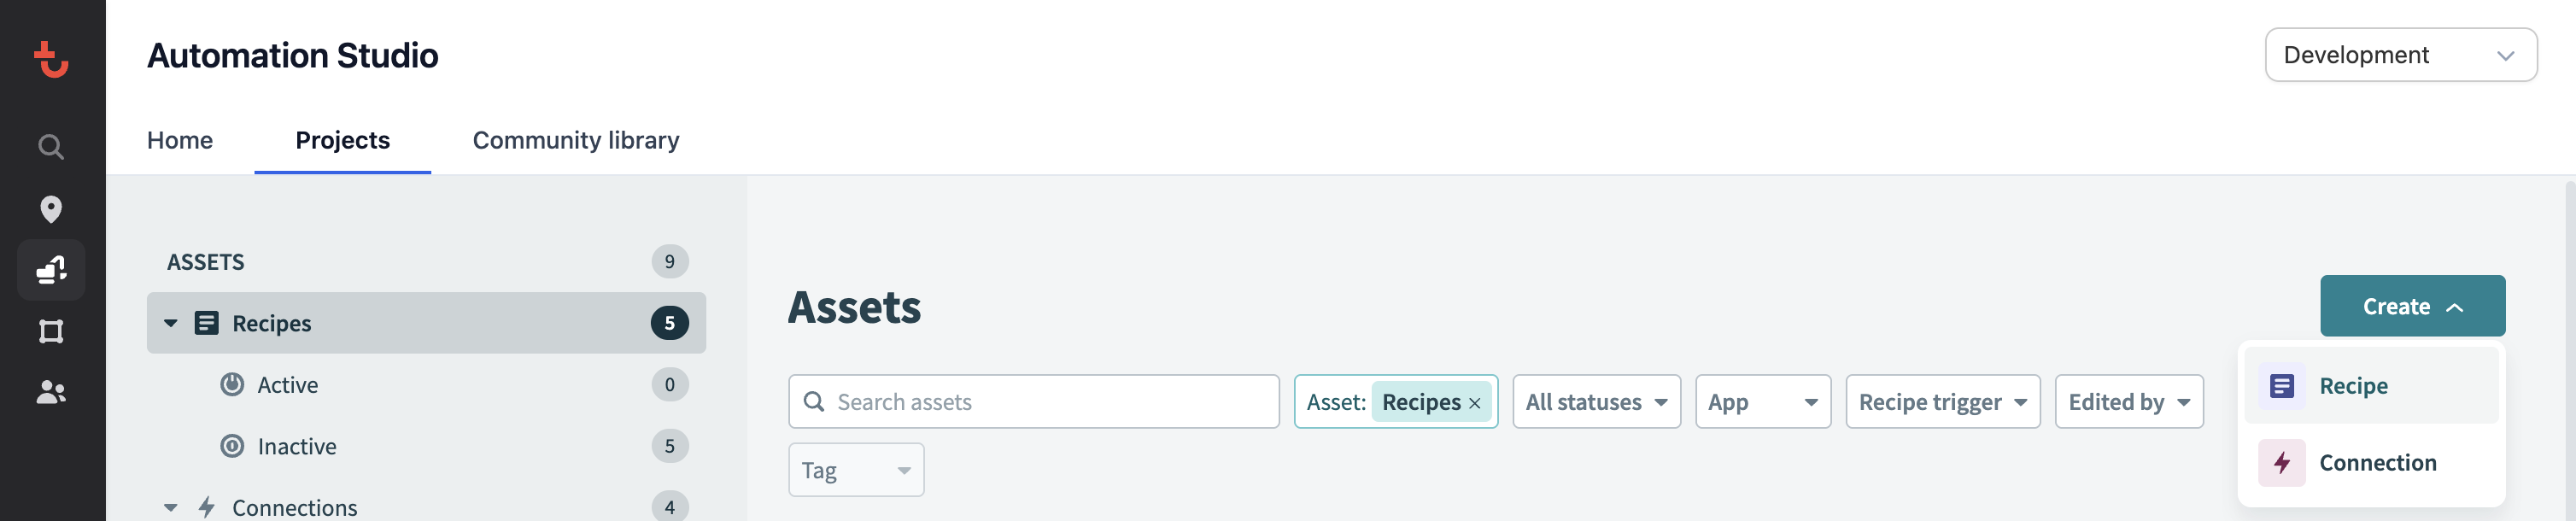
- Click on "Create Recipe" and provide a name and description for the recipe to ensure clarity for future reference.
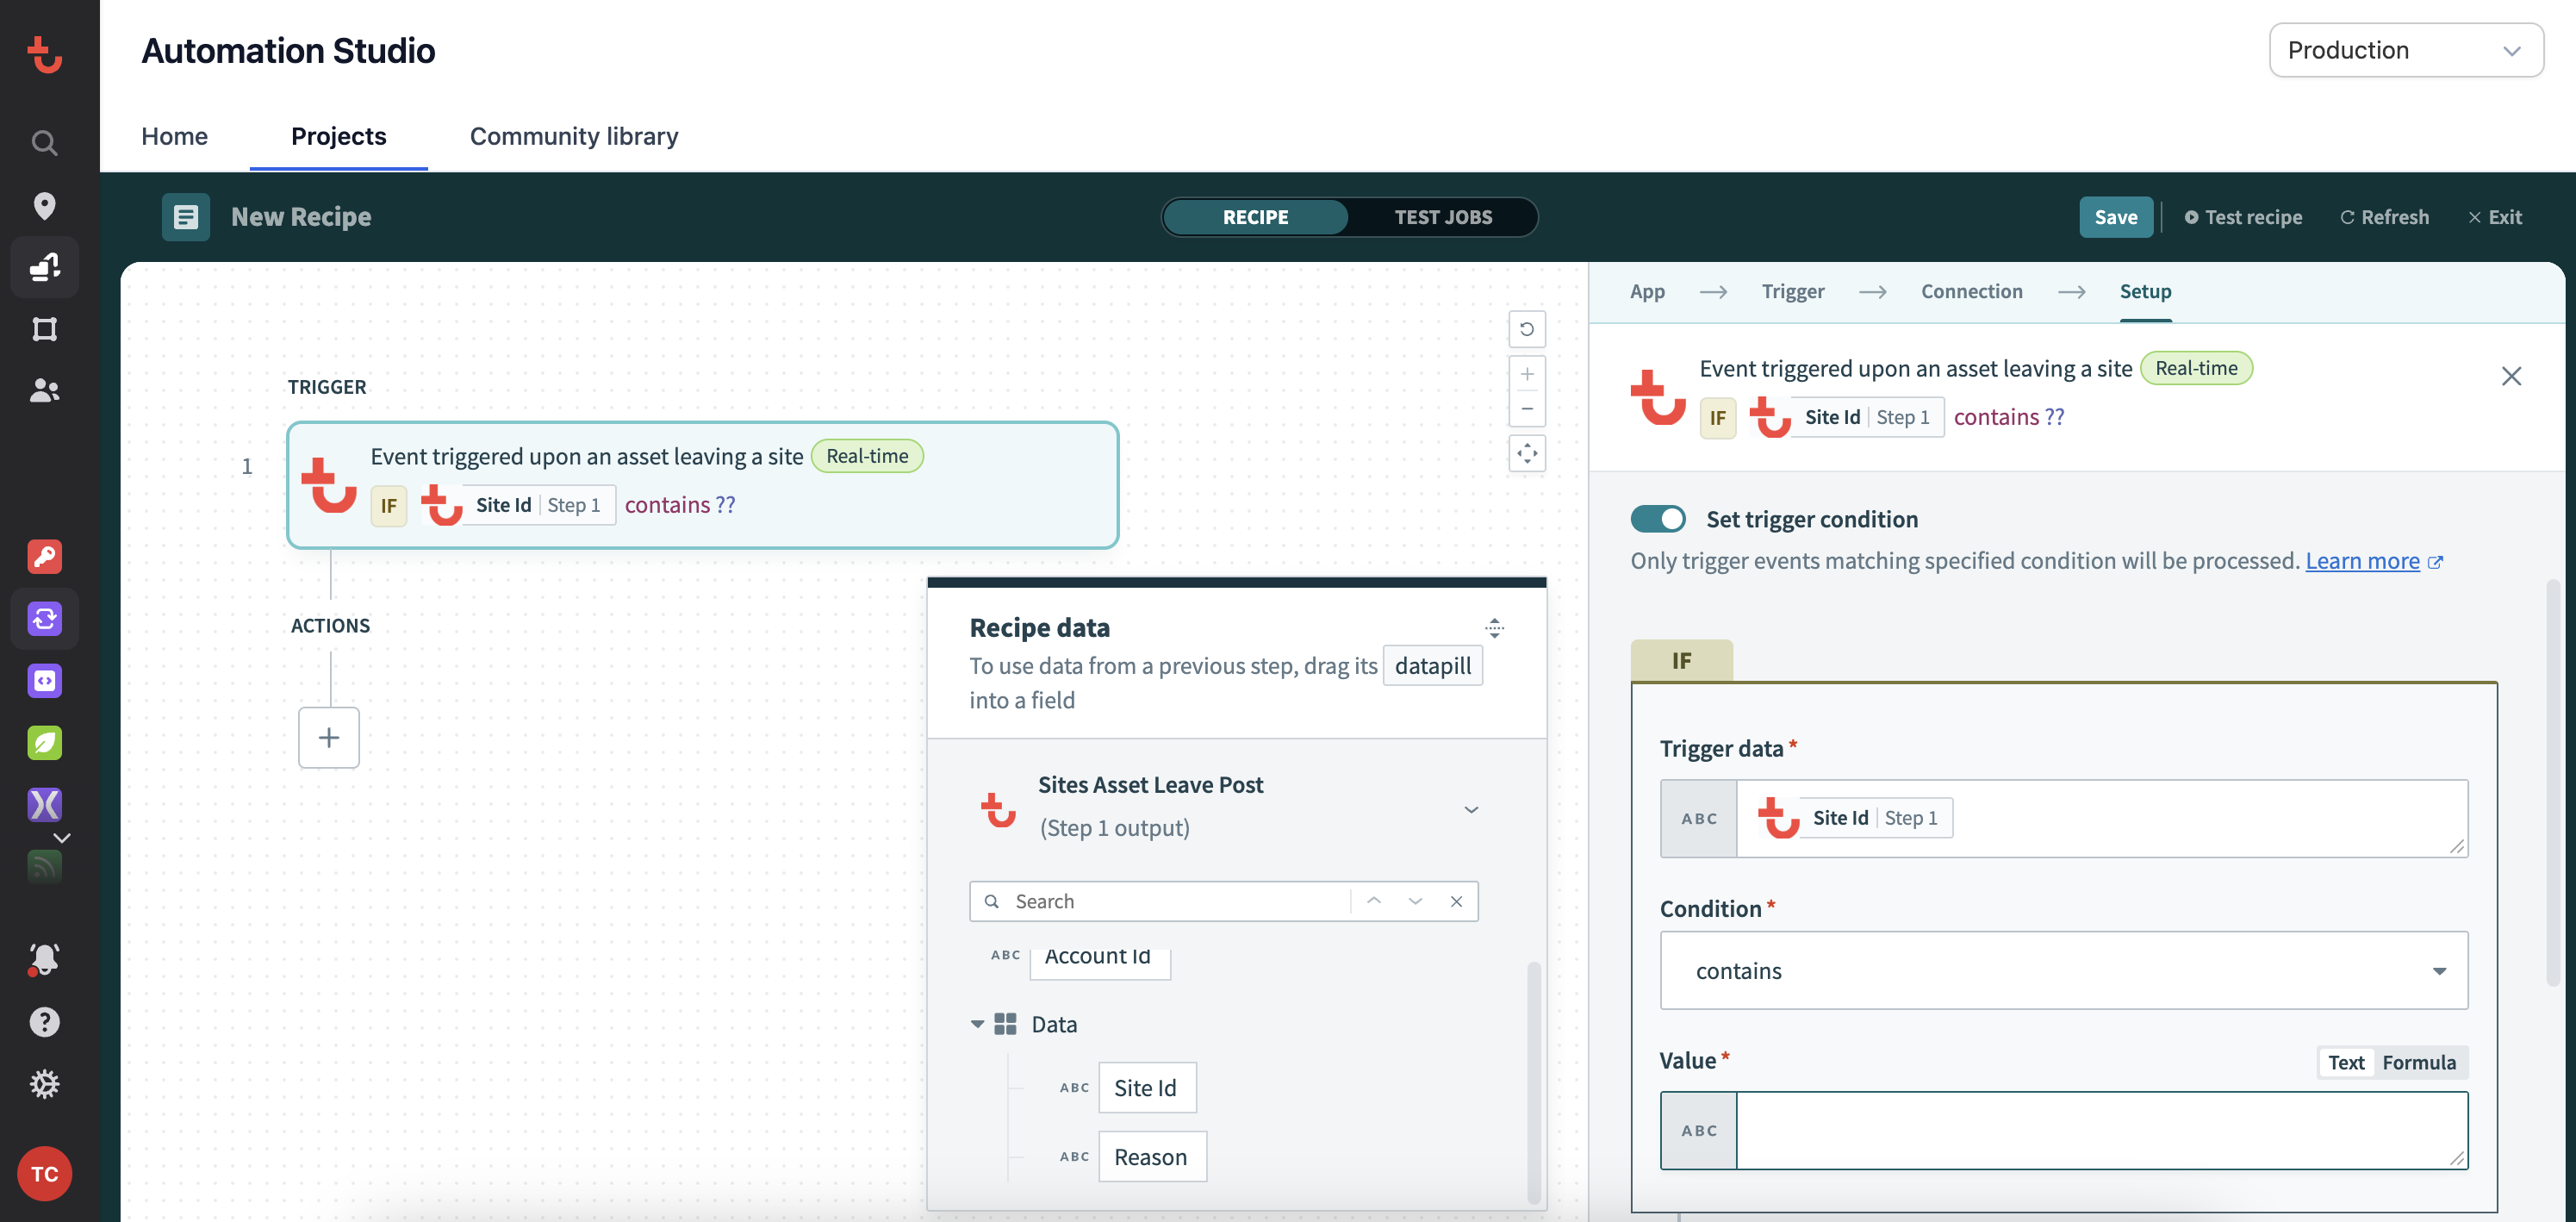
Choose Trigger
- Select the appropriate trigger type from the available options and configure the trigger settings, including any necessary parameters.

You have several options for the starting point of your recipe:
- Trigger from an app: Choose an app and trigger event to start your recipe. If you have not set up an connection to the app yet, the flow will prompt you to connect.
- Run on a schedule: Use the Scheduler trigger to run your recipe at specified intervals, such as once a week. You can also use cron expressions to create customized schedules.
- Trigger from a webhook: Use the Webhooks trigger to activate your recipe in real-time when webhook events are sent to a generated webhook address.
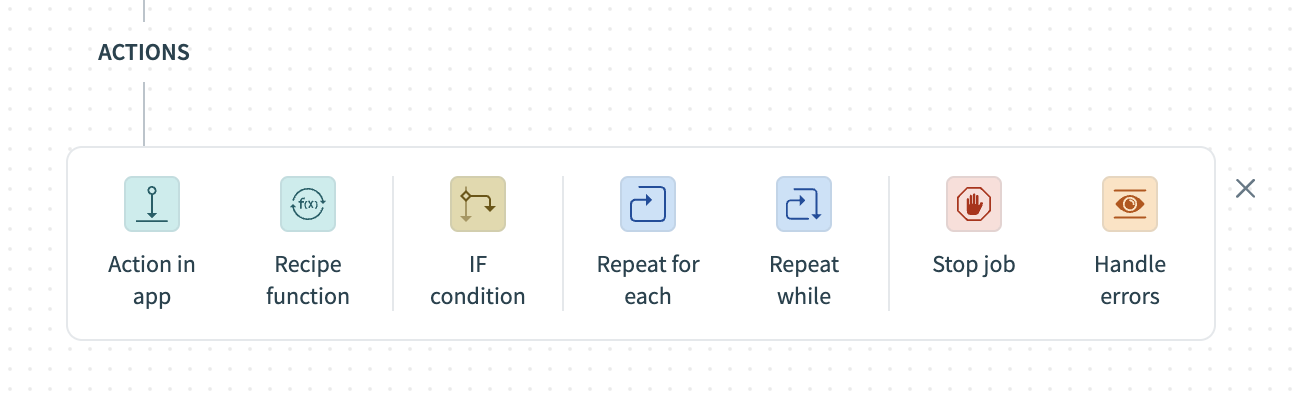
Add Actions and Set Conditions
- Add Actions to follow your trigger in the Recipe Builder
- Choose the action type that should occur when the trigger is activated.
- If you choose "Action in app" the system will prompt you to choose an existing app connection or connect a new app.
- Configure the action settings, specifying the target systems and data mappings.
- Set Conditions (if necessary):
- Add conditional logic to control the flow of actions.
- Use boolean expressions to define the criteria that must be met for actions to execute.
Testing and Deployment
- Testing the Recipe:
- Utilize the testing feature to simulate the trigger and validate that the actions execute as expected.
- Review logs and outputs to troubleshoot any issues.
- Deploy the Recipe: Once testing is complete, deploy the recipe to make it active. Monitor its performance and make adjustments as needed. See Environments & Deployments guide for more information.
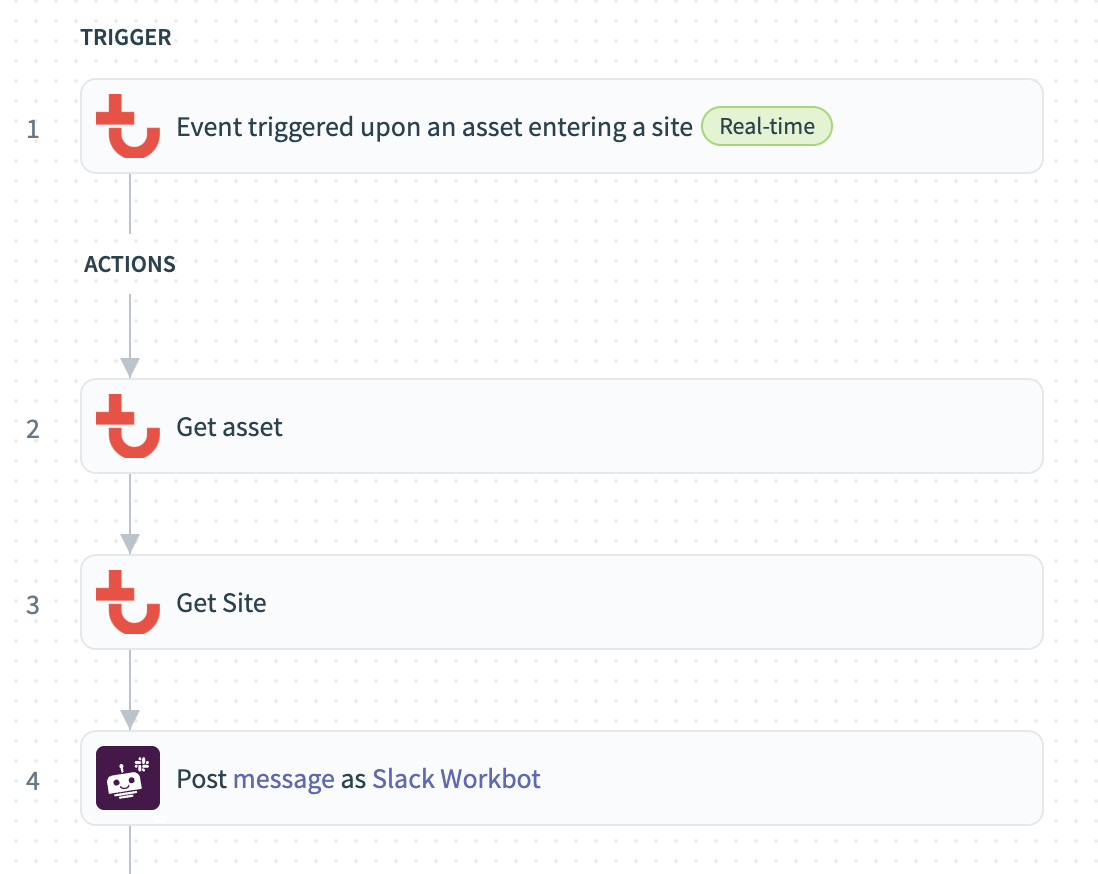
Guided ExampleReview a step-by-step example including a video guide for how to create your first recipe or get more information on Recipe Design in general.
Best Practices
- Modular Design: Break down complex workflows into smaller, reusable recipes to enhance maintainability and clarity.
- Error Handling: Implement error handling mechanisms within recipes to manage potential failures gracefully.
- Version Control: Maintain version control for recipes to track changes and revert to previous versions if necessary.
- Documentation: Document each recipe's purpose, triggers, actions, and conditions for future reference and onboarding of new team members.
Updated 6 months ago